Pages

Showing posts with label Recipe. Show all posts

Tuesday, December 17, 2013

The Most Incredible Red Velvet Cupcakes...EVER!!!


(a post by Allen)

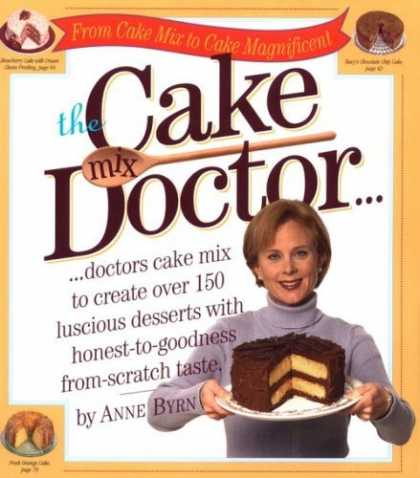
First of all, we must give credit where credit is due.  This post/recipe is derived from the Cake Mix Doctor's Red Velvet Cupcakes recipe.

 
So, when Mamaw Jean calls, you must answer.  You don't ignore the phone call.  You don't send it to voice mail.  And, you drop everything to fulfill whatever request is made.  A few years ago, on a   busy Christmas Eve, I was at work and noticed I had missed a call from Mamaw.  In a panic, I immediately checked my voice mail and there it was...the infamous voice mail message from Mamaw.  Now, before I reveal the content of the message, I must preface this by letting you know that I had not spoken to, nor heard from, my Mamaw in well over 2 weeks.  This message came (no lie) OUT OF THE BLUE.

Alright, here goes...

"Allen.  This is your grandmother.  I need three large gift bags." [CLICK]

It was Christmas Eve!  I had Christmas shopping to finish.  I had cookies to bake for Santa.  I had toys to put together for the kids.  I had Becky's family to visit.  What do you mean you need three...Yes, ma'am.


Guess who rushed to the store to buy three large gift bags and drove like a bat out of Hades to get to Louisville, TN.  Yep, you're right.  Me!
 
So, why am I bringing this up.  Well, I got another call from my precious, sweet, loving, adorable, "most-Christlike individual I have ever met" grandmother today.  Now, we all know my wife can cook.  Oh man, can she ever cook.  Mamaw Jean also knows this.  So this year, all Mamaw wants for Christmas is a teflon skillet (that's a different post) and Becky's Red Velvet Cake with cream cheese icing.
 
I wanted to share this recipe Becky came across.  I hope it blesses your, and your grandmother's, kitchen real soon.  It will change your life!  I promise!
  

Red Velvet Cupcakes

  • 1 package (18.25 ounces) plain German chocolate cake mix
  • 1 package (3.4 ounces) chocolate instant pudding
  • 1 cup sour cream
  • 1/2 cup water
  • 1/2 cup vegetable oil
  • 1 bottle (1 ounce) red food coloring
  • 3 large eggs

  1. Preheat oven to 350 degrees.  Line 24 cupcake cups with paper liners. 
  2. Place the cake mix, pudding mix, sour cream, water, oil, food coloring, and eggs in a large mixing bowl. Blend with an electric mixer on low speed for 30 seconds. Stop the machine and scrape down the sides of the bowl with a rubber spatula. Increase the mixer speed to medium and beat 2 minutes more, scraping down the sides again if needed. The batter should look thick and well combined (similar to brownie batter...it's thick!)  Fill 24 cupcake tins with an ice cream scoop of batter.  
  3. Bake the cupcakes until they spring back when lightly pressed with your finger, 18 to 20 minutes. . Place them on a wire rack to cool for 15 minutes before frosting.

Cream Cheese Frosting
  • 2 blocks of cream cheese (room temp)
  • 2 sticks of butter (room temp)
  • 2lbs of Confectioners sugar
  • 1tsp vanilla extract
  • splash of heavy whipping cream

  1. Cream together cream cheese and butter until smooth.
  2. Slowly add confectioners sugar and vanilla.
  3. After the sugar and vanilla is well incorporated add whipping cream until you have a pipe-able icing.

Tuesday, April 30, 2013

Loaded Potato and Buffalo Chicken Casserole


(a post by Allen)

So, I'm a "meat and potatoes" kinda guy.  What's better than that?  Well, for me it's buffalo sauce.  Here is a recipe that forever changed me.  LOADED POTATO AND BUFFALO CHICKEN CASSEROLE...

We made this and invited our friends over.  One of the best recipes we have EVER made.  There are several versions of this recipe online (Tasty Kitchen and Cook Lisa Cook).  This one is loosely derived from those.  I promise, your life will be forever changed!
 
(Picture from internet)

Prep Time: 15 minutes
Total Time: 1 hour 15 minutes
Servings: 6+

Ingredients
  • 3-4 lbs boneless skinless chicken breasts, cut into 1/2-inch cubes
  • 10 medium potatoes, cut into 1/2-inch cubes (with peel)
  • 1/3 cup olive oil
  • 1 1/2 teaspoons sea salt
  • 1 tablespoon fresh ground pepper
  • 1 tablespoon paprika
  • 1 tablespoon meat seasoning
  • 2 tablespoons garlic powder
  • 10 tablespoons hot sauce
  • Additional ¼ cup hot sauce (or more)

Topping
  • 2 cups fiesta Mexican blend cheese or 2 cups Monterey Jack and Cheddar cheese blend
  • 1 package bacon (cooked and crumbled)
  • 1 cup diced green onion 

Directions 

  1. Preheat oven to 500ยบF
  2. In a large bowl mix together the olive oil, 10 tablespoons of hot sauce, salt, pepper, garlic powder, meat seasoning & paprika.
  3. Add the potatoes and stir to coat
  4. Move the potatoes to a greased 9x12 baking dish.
  5. When scooping the potatoes into the baking dish, leave behind any extra olive oil/hot sauce mix.
  6. Add the diced chicken to the “left behind” olive oil/hot sauce mix and stir to coat all the chicken. Allow to marinate as the potatoes bake.
  7. Roast the potatoes for 45 minutes, stirring every 10-15 minutes, until cooked through and nice and crispy on the outside.
  8. Once the potatoes are fully cooked, add the marinated chicken.
  9. Once the potatoes are fully cooked, remove from the oven and lower the oven temperature to 400°F.
  10. In a large bowl mix all the topping ingredients together.
  11. Top the raw chicken with the topping.
  12. Bake 15 minutes or until the chicken is cooked through and the topping is melted and bubbly.
  13. Pour ¼ cup (or more) hot sauce over the dish and place back in the oven for an additional 5 minutes.
  14. Serve with extra hot sauce and/or ranch dressing.

Saturday, February 4, 2012

Potato Soup on steroids


A cold rainy day.  Your entire family at home.  No where to go, no chores that HAVE to be done....well that's a stretch.  We always have chores that have to be done.  Let me rephrase.  No chores I plan on doing.  A good movie.  Nothing could make a day better then a big ole pot of amazing potato soup.  Not just any potato soup....POE-TATE-OOOO soup. 

Regardless of whether you ever encounter one of these days (we rarely do) you still need to put this on your meal plan.  It's winter time....and the only perk winter brings is snow and soup. 

Typically I find recipes and tweak them but this recipe is straight from my imagination and Allen also gave me some great advice as well.  So this is an original Pruitt family soup. 

Before I share the recipe let me share some tips that will take this soup from good to gooooooooo-duh.

1.  Use Velveeta cheese.  I don't care how much cheaper the generic version is.  Use Velveeta. 

2.  Use half and half.  Don't substitute milk of any sort.  Not skim, not 2%, not whole.  Half and Half only.  Amen.

3.  Don't buy imitation bacon bits, or the "real" bacon bits.  Buy real bacon and then chop it up. 

4.  Boil your potatoes in chicken broth.  Not water.  The chicken broth adds just the right amount of flavor

3.I'm not a fan of potato peels.  So I peel half my potatoes and leave the skin on the other half.  But that's just my opinion.

4.  Use red potatoes.  Don't substitute for Idaho, or russet, or whatever other potatoes that catch your eye. 

5.  Add more or less flour to get the soup to the thickness you desire.

6.  Don't add your salt until you're done...depending on your love for salt you may or may not need it. 

6.  I'll stop being bossy now, I'm a mommy I can't help it.
--------------------------------------------------------------------------------------------------------------------------

Ingredients:
3 pounds red potatoes
1/4 cup butter, melted (1 stick)
1/4 cup flour
8 cups half-and-half
16 ounces Velveeta cheese, melted (use more if desired....fyi I desired)
Pepper to taste
Garlic powder, to taste
1 teaspoon hot sauce (optional...I opted NOT)
1/2 pound bacon, fried crisply
1 cup cheddar cheese, shredded
1/2 cup fresh chives, chopped
1/2 cup fresh parsley, chopped

Directions:
Dice unpeeled/peeled red potatoes into 1/2-inch cubes. Place in a large Dutch oven, cover with water and bring to a boil. Let boil for 10 minutes or until 3/4 cooked.

In a separate large Dutch oven, combine melted margarine and flour, mixing until smooth. Place over low heat and gradually add half-and- half, stirring constantly. Continue to stir until smooth and liquid begins to thicken.

Add melted Velveeta. Stir well. Drain potatoes and add to cream mixture. Stir in pepper, garlic powder and hot pepper sauce.

Cover and cook over low heat for 30 minutes, stirring occasionally.

Top with crumbled bacon, shredded cheese, green onions and parsley.
 

Simply Delicious Strawberry Cake


I was first introduced to this delictable cake by a lady we attend church with.  She came over one Saturday when Allen was going to be gone for most of the day and we had a baking party.  Baking parties rock.  So I owe Tammy a huge thank you for introducing me to a slice of heaven on earth. 

This is a Paula Deen recipe so that is all the proof you need that food magic is about to happen.  Allen isn't a big strawberry fan (freak) and he now says it's his favorite cake I've ever made.  Score! 

The cake is incredibly moist.  There is nothing worse than a dry cake.  And the icing...o my heavens!  The icing is perfection. 

I've made it 2 seperate times and I've come to the conclusion it's best if you make it as a layer cake vs. using a cake pan.  Regardless of how you make it, just do it. 


Simply Delicious Strawberry Cake-
  Click here for the food network directions

Ingredients

  • 1 (18.25-ounce) box white cake mix
  • 1 (3-ounce) box strawberry-flavored instant gelatin
  • 1 (15-ounce) package frozen strawberries in syrup, thawed and pureed
  • 4 large eggs
  • 1/2 cup vegetable oil
  • 1/4 cup water

  • Strawberry Cream Cheese Frosting
  • 1/4 cup butter, softened
  • 1 (8-ounce) package cream cheese, softened
  • 1 (10-ounce) package frozen strawberries in syrup, thawed and pureed
  • 1/2 teaspoon strawberry extract
  • 7 cups confectioners' sugar
  • Freshly sliced strawberries, for garnish, optional

Directions

Preheat oven to 350 degrees F. Lightly grease 2 (9-inch) round cake pans.
In a large bowl, combine cake mix and gelatin. Add pureed strawberries, eggs, oil, and water; beat at medium speed with an electric mixer until smooth. Pour into prepared pans, and bake for 20 minutes, or until a wooden pick inserted in the center comes out clean.
Let cool in pans for 10 minutes. Remove from pans, and cool completely on wire racks.
For the frosting:
In a large bowl, beat butter and cream cheese at medium speed with an electric mixer until creamy. Beat in 1/4 cup of the strawberry puree and the vanilla extract. (The rest of the puree is leftover but can be used in smoothies or on ice cream for a delicious treat.) Gradually add confectioners' sugar, beating until smooth.
Spread frosting in between layers and on top and sides of cake. Garnish with sliced fresh strawberries, if desired.

Friday, October 7, 2011

Crock Pot+Beef+Mushrooms=Dinner

Have I told you lately that I have 3 small kids? 

Hi!  I have 3 small kids.

One more thing.  My husband works exactly 1 million hours a week.  This is a new developement.  We are grateful for employment.  I keep telling myself that to keep from losing my mind. 

Now, you know the fun details of our household.  Contain your jealousy.

I realize that there are a bazillion other mothers out there with 3 or more small children with a lot more on there plate than I have on mine....and right now I'm thanking the Good Lord I ain't one of you.  My juggling skills are still developing...I still ain't got this figured out yet.  I'm loving every minute, but I'm dropping a lot of balls along the way. 

So, lets talk dinner. 

I love to cook.  I love to cook complicated things too!  Difficult things, food that challenges my kitchen skills.  Well, that ain't happ-nin no moe.  That's one of the balls I've dropped.  I still cook, I still love to cook.  Easy, simple, and delish is more my style these days.  AAAAAAAAAAAnnnnnd take out....aaaaaaaannnnnnnddddd delivery foods.  I confess. 

So, for all you Mamma's out there, or whoever reads my blog this recipe is delish, and easy.  It involves a crock pot, beef, and mushrooms.

If you're like me you can put all the ingredients in your crock pot and then change diapers, wipe butts, fix sippy cups, make bottles, do dishes, laundry, work, work, work, work, and work.  It's fun, come by and help me sometime!

Make this!


Ingredients:
1 1/2 lb boneless beef sirloin tip steak, cut into 1-inch pieces
1 jar (12 oz) beef gravy
1 tablespoon Worcestershire sauce
1 tablespoon Dijon mustard
1 package (8 oz) sliced fresh mushrooms (3 cups)
2 tablespoons all-purpose flour
2 tablespoons water
Directions:
1. In 3- to 3 1/2-quart slow cooker, mix all ingredients except flour, water and potatoes.
2. Cover; cook on Low heat setting 6 to 8 hours.
3. In small bowl, mix flour and water; stir into beef mixture. Increase heat setting to High. Cover; cook 15 to 20 minutes or until thickened.

Feel free to serve this over noodles, rice, mashed potatoes, or a slice of bread. 
Betty Crocker invented this recipe.  I love her.

Friday, September 2, 2011

Cajun Chicken Pasta


This recipe is straight from Ree Drummond aka PW

It is heavenly!  Just ask my hips, or my butt, or my thighs, or my gut, or any of my jiggly parts...SO basically all of me. 

Allen should be blogging this because I have never made it.  He has always been the one to bring this phenomenal dish to the table. 

The only right I have to blog this recipe is because I sit back and watch his every move, and back seat drive my way through his cooking of this dish. 

It goes something like this

"are you SURE you want to cut the peppers like that?"
"you're making a mess do you plan on cleaning it up?"
"do you have to use that many dishes?"
"are you sure you don't want me to take over?"
"Ya know I'll take over...you just say the word"
"Why aren't you saying the word?"
"Just say the freaking word already!"

Then he kicks me out of the kitchen. Most wives would be so happy that their husbands are cooking dinner they'd pour salt in a wound before saying anything.  But I'm difficult...and somehow he deals with it. 

This recipe calls for white wine.  Typically you can substitute white wine with chicken broth.  Don't do that for this recipe.  Go all out and be a lush.  Use white wine.  I freaked out a little at first because I didn't want to have to go to the liqueur store to purchase wine (that's how folks roll here in Tennessee).  I mean what if I saw someone I went to church with in there?  I'd have to judge them...we can't have that!  hahahahahahaha I'm totally kidding. 

Good news!  They sell cooking wine at the grocery store!  So, now you don't have to stop at the liqueur store on your way home...and judge...or be judged.  Yep, I totally went there. 


Prepare your taste buds cause this is some good eatin!

Ingredients

  • 3 whole Boneless, Skinless Chicken Breasts, Cut Into Cubes
  • 3 teaspoons Cajun Spice Mix, More To Taste
  • 1 pound Fettuccine
  • 2 Tablespoons Olive Oil
  • 2 Tablespoons Butter
  • 1 whole Green Bell Pepper, Seeded And Sliced
  • 1 whole Red Bell Pepper, Seeded And Sliced
  • 1/2 whole Large Red Onion, Sliced
  • 3 cloves Garlic, Minced
  • 4 whole Roma Tomatoes, Diced
  • 2 cups Low Sodium Chicken Broth
  • 1/2 cup White Wine
  • 1 cup Heavy Cream
  • Cayenne Pepper To Taste
  • Freshly Ground Black Pepper, To Taste
  • Salt To Taste
  • Chopped Fresh Parsley, To Taste

Preparation Instructions

Cook pasta according to package directions. Drain when pasta is still al dente; do not overcook!
Sprinkle 1 1/2 teaspoons Cajun spice over chicken pieces. Toss around to coat. Heat 1 tablespoon oil and 1 tablespoon butter in a heavy skillet over high heat. Add half the chicken in a single layer; do not stir. Allow chicken to brown on one side, about 1 minute. Flip to the other side and cook an additional minute. Remove with a slotted spoon and place on a clean plate.

Repeat with remaining chicken. Remove chicken, leaving pan on high heat.
Add remaining olive oil and butter. When heated, add peppers, onions, and garlic. Sprinkle on remaining Cajun spice, and add salt if needed. Cook over very high heat for 1 minute, stirring gently and trying to get the vegetables as dark/black as possible. Add tomatoes and cook for an additional 30 seconds. Remove all vegetables from the pan.

With the pan over high heat, pour in the wine and chicken broth. Cook on high for 3 to 5 minutes, scraping the bottom of the pan to deglaze. Reduce heat to medium-low and pour in cream, stirring/whisking constantly. Cook sauce over medium-low heat for a few minutes, until cream starts to thicken the mixture. Taste and add freshly ground black pepper, cayenne pepper, and/or salt to taste. Sauce should be spicy!

Finally, add chicken and vegetables to sauce, making sure to include all the juices that have drained onto the plate. Stir and cook for 1 to 2 minutes, until mixture is bubbly and hot. Add drained fettuccine and toss to combine.

Thursday, September 1, 2011

Ice Cream Drama


Ice Cream Drama.

Out of all the drama one can face I suppose ice cream drama is the best way to go.

I have homemade peach ice cream memories as a child that would rock your taste buds off. 

So I set out to make homemade ice cream.  Sounds easy right?

Nope.  Not Easy.

I scoured the internet for the perfect ice cream maker.  Of course the perfect ice cream maker would need to make the homemade process EASY, and it would need to be red.  My kitchen is red.  I don’t plan on making waves in my red kitchen.

OOOOO and I didn’t want to spend an arm and a leg on my ice cream machine because I get in cycles.  I loose interest in things very easily.  Ask the bread machine, the smoothie maker, my magic bullet, and the various other kitchen gadgets I had to have and then quickly lost interest in. 

Amazon.  I love amazon.  I buy lots and lots from amazon.  My husband would be happy if amazon banned me.  But that would make amazon sad...and poor. 

Anyway, I found quite a few ice cream makers that I loved.  Like the million dollar cuisine art one that the pioneer woman uses. Or the old timey fashion kind that I remember from my childhood.  I knew I did NOT want one that I had to churn by hand…that’s a whole lot of stupid. 

I found this pretty little pink precious ice cream maker.  It wasn’t a very expensive and it was PINK!  Um hello…how can anything pink be bad?  It isn’t red…but pink is totally awesome.  So I purchased this pink precious little thing. 


It took 3 weeks to arrive.  Three solid weeks.  Three weeks is a long time to wait on ice cream… at least the homemade kind.  Three stinking weeks.  Did I mention it took three weeks to arrive?   Well it did, and I was very bitter about it. 

When it finally came I ripped it out of the box and it was so pretty…and soooooooo not what I expected.  It came with 2 bowls that you put in the freezer for EIGHT hours.  That’s right EIGHT stinking hours. 

This is where it comes in handy to READ THE REVIEWS before you purchase something.  The pretty little pink ice cream maker only makes 2 small bowls of SOFT SERVE ice cream.  AND it doesn’t work.  It makes syrup like nonsense.  I have done everything imaginable to make it work.  It doesn’t.  It’s pretty and pink.  But it doesn’t make ice cream.  Stupid, stupid stupid. 

So now, I tuck my pink tail between my legs and go down to food city and buy an ugly old timey Rival brand ice cream maker.  It’s ugly.  It’s blue.  The box wasn’t fancy.  I had serious concerns…I still wanted the stainless steel cuisine art one that PW uses.  Against my better judgement I finally got an ugly blue old fashion looking ice cream maker…that doesn’t require me to crank it.  The only perk might I add. 


Guess what!?

The ice cream it made was heavenly.   Worked like a charm on the first try! 

So maybe my ugly blue rival ice cream maker isn’t so bad after all.  But it’s still ugly.

I winged it when it came to the recipe I used…so if you have an ice cream maker I’d seriously make this kind!  I created it and it is GOOOOOOD. 

Cookie Dough Homemade Ice Cream!
2 cups of half and half
2 cups of heavy cream
1 tblspoon of vanilla extract
3 cups of cookie dough

Moral of the story?  Don't judge an ice cream maker by the box...or color.

Sunday, July 3, 2011

Tips, Tricks, and a Few shortcuts.


I'm not sure how I ended up being a person of "knowledge" when it comes to cooking, or baking.  Somewhere along the way I've become a go to person for quite a few people when looking for tips, tricks, and shortcuts when it comes to cooking, baking, or kitchen related knowledge.  

I ADORE being in the kitchen.  I love cooking, and baking and anything having to do with preparing food.  I get it honest.  My Ma and Pa are king and queen of the kitchen, My Granny is a phenomenal cook, as well as my Dad and Step-Mom.  So I have had quite a bit of awesome cookers (that's Ethan's favorite word BTW)  in my life.  I have sat on more kitchen counter tops watching family members cook then anyone I know.  Those memories are precious to me, and all children who come through our house gets their fair share of "counter" time helping me cook. 


I by no means consider myself a professional or ANYWHERE close to a pro but I do have some sneaky tricks of the trade that I'm willing to pass along to make your kitchen time easier, better, and the fruits of your labor extra delicious. 

When cooking or baking use REAL butter. 
-Butter is Better
-If a little butter is good, more butter is better.  Amen.  Glory Hallelujah. 
In all seriousness baking with butter gives your baked goods a completely different texture and flavor then a butter substitute.  When baking a cake please for the love of all things holy and good use real butter. 

Somewhere in some factory people will cut your veggies for you and freeze them.  Making it possible for you to go to your grocery store, find the frozen veggie isle and purchase frozen cut up bell peppers and onions. 
Cutting onions makes me cry.  Cutting anything in small pieces is time consuming.  So instead of doing it myself I take a shortcut and buy frozen peppers and onions already chopped.  Keep the flavor, lose the time consuming part of the task.  It's a win/win situation.

Cake mixes.  They rock my world.  I don't like the "boxed" taste though.  So allow me to share with you ways to turn your boxed cake mix into a homemade cake tasting delight!  All of these tips come from Anne Byrn author of the best cook book ever "The Cake Mix Doctor".

*Flavor Boosters for a cake mix include*
-Lemon Zest
-Coffee
-Poppy Seeds
-Coconut
-Unsweetened Cocoa Powder
-Peppermint Schnapps
-Fresh Strawberries

*Making it Richer*
-Buttermilk
-Whipping Cream
-Sour cream
-Eggs
-Yogurt
-Butter (real)
-Peach Puree

*Offsetting the cake mix taste*
-Dry Sherry
-Lime Zest
-Pure Almond Extract

I remember my Ma teaching me the proper way to grease a cake pan.  First you coat it with crisco and then dust your flour making sure all surfaces of your cake pan have a generous coating of this no fail perfect non stick formula.  Well guess what those days are over.  Allow me to introduce you to "Bakers Joy" cooking spray and "Pam with Flour".  If you bake and want your cakes to flawlessly come out of your pan buy one of these sprays.  They work just like the old method, and it is A LOT less time consuming...and a lot less messy. 


Use real vanilla extract.  Say goodbye to "immitation" vanilla extract. 

Wilton has icing dye.  When dying food, or icing use the wilton gel icing gel.  Using regular food dye will  water down your icing making it harder to decorate with.  You can purchase this from hobby lobby, occasionally at wal-mart (if your're in knoxville the turkey creek walmart always has it), or amazon.


I have quite a few passions and cooking is one of them.  So, anything I learn along the way that might benefit my readers I am more than happy to share.  Feel free to sharen your tricks of the trade with me I am always willing to learn!

Sunday, June 26, 2011

Red Velvet Truffles

I recently make these for a church fundraiser and they were a hit!  In fact they happened to be my father in laws favorite!  They are very tasty and they look super fancy...I love it when that happens!  So here you go!  A super fun recipe to impress your friends and family with. 

Red Velvet Cake Truffles

Red Velvet Cake Balls


Red Velvet Cake Balls ( aka truffles)
~1 box red velvet cake mix (cook as directed on box for 13 X 9 cake)
~1 can cream cheese frosting (16 oz.)
~1 package chocolate bark (regular or white chocolate)

1. After cake is cooked and cooled completely, crumble into large bowl.
2. Mix thoroughly with 1 can cream cheese frosting. (It may be easier to use fingers to mix together, but be warned it will get messy.)
3. Roll mixture into quarter size balls and lay on cookie sheet. (Should make 45-50)
4. Chill for several hours. (You can speed this up by putting in the freezer.)
5. Melt chocolate in microwave per directions on package.
6. Roll balls in chocolate and lay on wax paper until firm. (Use a spoon to dip and roll in chocolate and then tap off extra.)


For step by step instructions you can go
or


These are a must have!  Enjoy!

Monday, June 6, 2011

Chocolate Lava Cake


Do you have a crock pot? 

Do you know how to follow the directions on the back of a chocolate cake mix?

Do you know how to make chocolate pudding?

Do you know how to sprinkle chocolate chips on top of something?

If you answered yes to all of those questions then you can make the best chocolate cake on the planet. 

If you answered No to any of those questions you need to seek professional help. 

Crock Pot Lava Cake

1 chocolate cake mix
3 eggs
1/3 cup vegetable oil
1 2/3 cup water
1 package (4 serving size) instant chocolate pudding
2 cups milk
1 bag (12 ounces) milk chocolate chips

Spray crock pot with cooking spray. Mix cake batter using cake mix, eggs, oil, and water. Pour into crock pot. Prepared pudding using mix and milk. Pour pudding over cake batter. Sprinkle chocolate chips evenly over the surface. Cook on HIGH for 2 ½ hours or until top starts to look dry and you can see the chocolate starting to spit up around the sides and in the middle. Serve hot with ice cream.

Sunday, June 5, 2011

Knock you Naked Brownies- Per PW

I recently died and went to heaven.  OK...so not really.  But I did make these KILLER brownies and heard angels singing, bright glowing lights, the whole nine yards. 

I found this recipe at thepioneerwoman.com and immediately jumped in the mom mini van and drove to food city bought all the ingredients and made them. 

You should do the exact same thing after you read this recipe.  Get out your shopping list, find your keys that your children have hidden from you, and hope to goodness you haven't lost your debit card....o wait maybe those are just my issues when attempting to leave the house. 

This kicks the boxed brownie mix butt all over food kingdom.  Kiss the boxed version of brownies goodbye, you shall no longer need them ever ever again. 

The first time I tasted these brownies I fell into the kitchen floor and moaned.  Then called in the armed forces to get me up...big girls fall hard.

The next morning I caught Ethan sitting on top of the counter with a fork eating the browning straight out of the pan.  I didn't yell at him, I just grabbed another fork and joined in on the fun.  Total mother son bonding moment.

So here you go!  The worlds best brownie recipe you will ever in your life encounter. 

Ingredients

  • 1 box (18.5 Ounce) German Chocolate Cake Mix (I Used Duncan Hines) (these do NOT have a boxed cake mix taste.  I promise!)
  • 1 cup Finely Chopped Pecans
  • ⅓ cups Evaporated Milk
  • ½ cups Evaporated Milk (additional)
  • ½ cups Butter, Melted
  • 60 whole Caramels, Unwrapped
  • ⅓ cups Semi-Sweet Chocolate Chips (I used milk choc chips and only used 1/4 of a cup)
  • ¼ cups Powdered Sugar

Preparation Instructions

Preheat oven to 350 degrees.

In a large bowl, mix together cake mix, chopped pecans, 1/3 cup evaporated milk, and melted butter. Stir together until totally combined. Mixture will be very thick. (Almost like cookie dough)

Press half the mixture into a well-greased 9 x 9 inch square baking pan. Bake for 8 to 10 minutes. Remove pan from oven and set aside.

In a double boiler (or a heatproof bowl set over a saucepan of boiling water) melt caramels with additional 1/2 cup evaporated milk. When melted and combined, pour over brownie base. Sprinkle chocolate chips as evenly as you can over the caramel.

Turn out remaining brownie dough on work surface. Use your hands to press it into a large square a little smaller than the pan. Use a spatula to remove it from the surface, then set it on top of the caramel and chocolate chips.

Bake for 20 to 25 minutes. Remove from pan and allow to cool to room temperature, then cover and refrigerate for several hours. When ready to serve, generously sift powdered sugar over the surface of the brownies. Cut into either nine or twelve helpings, and carefully remove from the pan.

-Go here if you would like the step by step instructions
http://thepioneerwoman.com/cooking/2011/05/knock-you-naked-brownies/

Wednesday, May 25, 2011

Easy Bar-B-Q

If my daddy were to read this recipe he would call me up and give me a big fat lecture about how horrible of a cook I've turned out to be. 

OK...so that is a slight exaggeration.  He would however roll his eyes and make a mental note to never ever eat anything from my kitchen ever again.

OK...so that is a slight exaggeration.  He would call me up and tell me the correct way to make BBQ, then take me out of his will.  Which is a big deal because I'm his only heir.  But...I really don't know what all I'm getting willed, and the thought of not having my dad around is what my nightmares consist of.  So I don't care so much about being taken out of the will.  Keep the will, and I'll keep my Daddy!

What I'm trying to tell you is that when it comes to BBQ my dad is "DAAAA MAN!"
He could totally beat up your dad in BBQ wars.  I'm calling food network.  Watch out Bobby Flay!

He smokes it, and prays over it, cries over it, thinks about it for months in advance, selects the finest ingredients.  Serious.  Business.  He even makes his own BBQ sauce and cans it.  Serious.  Business.

My Dad doesn't read my blog.  My Dad doesn't know I have a blog.  Why?  He has better things to do like run a town, be a cattle farmer, do boy stuff in big trucks, watch TV, teach punks not to break the law, you know important stuff like that.  So, I decided to share with you this recipe which would not make my father very proud.  Don't tell my Dad about my blog ok? 

This is my Dad, I googled this picture.  How cool is that?  My dad is google-able and it isn't bad!  Do we look alike?

Here's the thing.  It's easy.  It involves a crock pot, it's easy, you can make it fit your taste buds very easily, it's easy, and it isn't half bad.  Actually it's really good.  It ain't "I cooked this in a BBQ smoker for 8 years" good, but it is still good. 

You need 3 ingredients-

Chicken breasts or thighs (your preference...we're boob people so we go with chicken breasts)
Chicken Broth
BBQ Sauce

Season your chicken with garlic salt, and pour just enough broth to cover the bottom of your crock pot.  Pour your BBQ sauce over your chicken, put a lid on it and cook on low for 8 hours. 

When your ready to serve use 2 forks to tear apart your chicken (super easy and tender), add more sauce if that's how you like it and serve!

I make garlic bread, throw together some Cole-slaw, and everyone enjoys! 

Monday, May 16, 2011

Crock Pot Tomato Cream Lasagna

Who would have thought you could make lasagna in a crock pot?  Well, you can!  AND it's good!  I found this recipe on another food blog and tweaked it to make it fit our taste buds.  Say goodbye to store bought frozen lasagnas and say hello to homemade!  It is so simple and you'll be voted mom of the year, or wife of the year, or single cat lady of the year, or whatever.

Fix it, and forget about it.  Then go get a blanket and watch soap operas on the couch cause it's cold outside today.  Not that I would ever do a thing like that ;)

  • 1 pound Lean Ground Beef
  • 1 jar Spaghetti Sauce
  • 1 cup heavy cream
  • 2 cups Cottage Cheese
  • 1 cup Ricotta Cheese
  • 2 cups Shredded Mozzarella Cheese (I also added some sharp cheddar cheese)
  • ½ cups Parmesan Cheese, Shredded
  • 6 whole Lasagna Noodles, Regular, Uncooked
  • ¼ cups Water

In frying pan, brown ground beef and drain fat.
Add water and pasta sauce and cream, reserving a small amount of sauce to line bottom of crock pot. Stir until well blended.
Line bottom of crock pot with very thin layer of sauce, then top with 2-3 uncooked lasagna noodles that are broken to fit shape (some overlap is fine).
Cover noodles with half the cottage cheese, ricotta,  mozzarella cheese, and Parmesan cheese, then top cheeses with half of the meat mixture.
Repeat layers with the other half of the ingredients. Cook on low for 4 hours.

Sunday, April 10, 2011

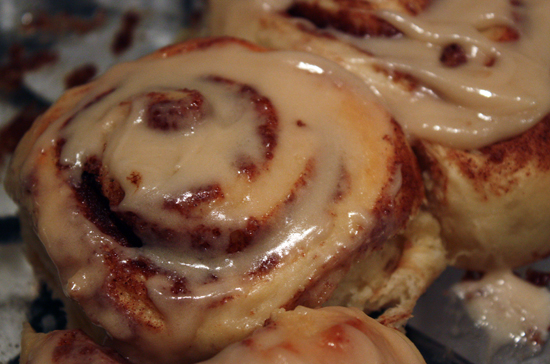
Cinnamon Rolls

I have been looking for a good cinnamon roll recipe for some time now.  I wanted a challenge.  I wanted to feel a sense of accomplishment.  Popping open a can of Pillsbury sweet rolls doesn't always give me that type of thrill.  They taste awesome!  But they don't invoke pride.  All calories, no pride.

I am always looking for ways push myself to try new things and up my game.  It is easy to do when you work outside the home, but I have found it slightly more difficult now that I spend my days devoted to taking care of my family.  I try and keep several projects going at all time to break up the everyday routine.  I find that I enjoy my life and my role better if I find things to challenge my skill set.
We all know that a happy wife = a happy life! 


I have always been very intimidated by homemade breads.  Working with yeast is like calling up the moodiest woman you can think of.  You never really know how it's all going to turn out in the end.  You may think you've done everything right, and then it results in a complete diaster.  Or you may think you have totally screwed up and it turns out great!  You just never know.  I don't like that.  I like knowing what I'm dealing with.  So in my baking I try and avoid all recipes that involve yeast, rising, kneading, waiting, and "unknown" factors. 

THEN I came across a recipe for Cinnamon Rolls.  I knew that I had to tackle my fear of the unknown.  They spoke to me, gave me courage to tackle yeast breads, inspired me, made my mouth water, made me unbutton my pants just reading about them, food speaks to me.  I love food.  I love preparing food.  I love sharing my creations with others.  It makes me happy.  Happy wife=happy life.

I read every tip I could find, looked through every single recipe for cinnamon rolls that exists, and am here to share what I've learned through my trials, errors, and sucesses.  This recipe is the combination of 1,500 different recipes plus a little of my own imagination. 

These cinnamon rolls will change your life.  You'll never be the same.  The dough boy ain't got nothing on me.  The recipe makes approx 50-60 rolls.  You can freeze them before you bake them, or after you bake them.  I bought several of the disposable tin pans and baked them, iced them, wrapped them up and stuck them in the freezer.  They take some work.  But it is worth every moment of your time. 


For the Bread-
1 quart Whole Milk
1 cup Vegetable Oil
1 cup Sugar
2 packages Active Dry Yeast, 0.25 Ounce Packets
8 cups (Plus 1 Cup Extra, Separated) All-purpose Flour
1 teaspoon (heaping) Baking Powder
1 teaspoon (scant) Baking Soda
1 Tablespoon (heaping) Salt


For the Filling-
2 cups Sugar ( I use 1 cup of dark brown sugar and 1 cup of light brown sugar)
Generous Sprinkling Of Cinnamon
2 sticks of melted butter (more if needed...embrace butter)

For the Icing-
1 bag Powdered Sugar
1 tsp vanilla extract
½ cups Milk
¼ cups Melted Butter
1 pkg cream cheese (softened)


Making the dough-

Mix the milk, vegetable oil and sugar in a pan. Scald the mixture (heat until just before the boiling point). Turn off heat and leave to cool 45 minutes to 1 hour. When the mixture is lukewarm to warm, but NOT hot, sprinkle in both packages of Active Dry Yeast. Let this sit for a minute. Then add 8 cups of all-purpose flour. Stir mixture together. Cover and let rise for at least an hour.

After rising for at least an hour, add 1 more cup of flour, the baking powder, baking soda and salt. Stir mixture together. (At this point, you could cover the dough and put it in the fridge until you need it – overnight or even a day or two, if necessary. Just keep your eye on it and if it starts to overflow out of the pan, just punch it down).

When ready to prepare rolls: Sprinkle rolling surface generously with flour. Take half the dough and form a rough rectangle. Then roll the dough thin, maintaining a general rectangular shape. Drizzle 1/2 to 1 cup melted butter over the dough. Now sprinkle 1 cup of brown sugar mixture over the butter followed by a generous sprinkling of cinnamon.

Now, starting at the opposite end, begin rolling the dough in a neat line toward you. Keep the roll relatively tight as you go. Next, pinch the seam of the roll to seal it.

Spread 1 tablespoon of melted butter in a seven inch round foil cake or pie pan. Then begin cutting the rolls approximately ¾ to 1 inch thick and laying them in the buttered pans.

Repeat this process with the other half of the dough. Let the rolls rise for 20 to 30 minutes, then bake at 375 degrees until light golden brown, about 15 to 18 minutes.

For the frosting, mix together all ingredients listed and stir well until smooth. It should be thick but pourable. Taste and adjust as needed. Generously drizzle over the warm rolls. Go crazy and don’t skimp on the frosting.


TIPS AND TRICKS-

1.  Don't burn the yeast!  If it is to hot to take a bath in, it's to hot to add the yeast.  LUKEWARM....not HOT. 

2. *When making the filling*  I love the taste of brown sugar and cinnamon.  If you don't then use white sugar and cinnamon instead of brown.  You can also add nuts and raisins to the filling too.  Be creative.

3.  Apply icing as soon as your rolls come out of the oven.  You want it to get into the creaks and crannies of the rolls.  Oooey gooey goodness.

4.  For a thicker icing add more powdered sugar.  For a thinner icing (aka glaze) add more milk.  I love cream cheese icings.  But, you can use vanilla, powdered sugar, and milk if you prefer a non cream cheese type icing.  Another yummy variation is using maple flavoring, and a dash of strong coffee to the sugar and milk mixture.  *see recipes below*

5.  Be prepared to make a mess.  Butter can be messy.  Embrace butter. 

6.  Freezer Friendly
* You can freeze the rolls, unrisen, in the pan. Cover them tightly with both plastic wrap and aluminum foil. Then you’ll just need to remove them, allow them to thaw and rise, and continue the baking and icing process.
* You can freeze the rolls, baked but unfrosted. Later, you can thaw them out, warm them for just a few minutes in the oven, and ice them while warm.
* OR you can freeze the rolls completely iced and finished. Just allow them to cool, then cover with plastic wrap and foil. This is my method of choice.  Works great!

7.  If you have trouble getting your dough to rise in a timely fashion turn on your oven light and put the dough into the oven with the door shut.  The heat from the oven light creates the perfect atmosphere for yeast to rise.  Please don't forget you have it in there and turn the oven on.  That would be bad.

I realize this is a lot of information at one time.  If you have any questions feel free to ask, I'm happy to help!
Make these and share them with all the wonderful people in your life. 

Regular Icing-
3cups powdered sugar

3 tablespoons milk
Stir together sugar and milk until smooth
Maple/Coffee Icing-
1 bag Powdered Sugar
2 teaspoons Maple Flavoring ½ cups Milk ¼ cups Melted Butter ¼ cups Brewed Coffee ⅛ teaspoons Salt
Mix together all ingredients listed and stir well until smooth. It should be thick but pourable. Taste and adjust as needed. Generously drizzle over the warm rolls.